Nextiva how to assign a phone to a user
Assigning a phone to a user NextOS Admin
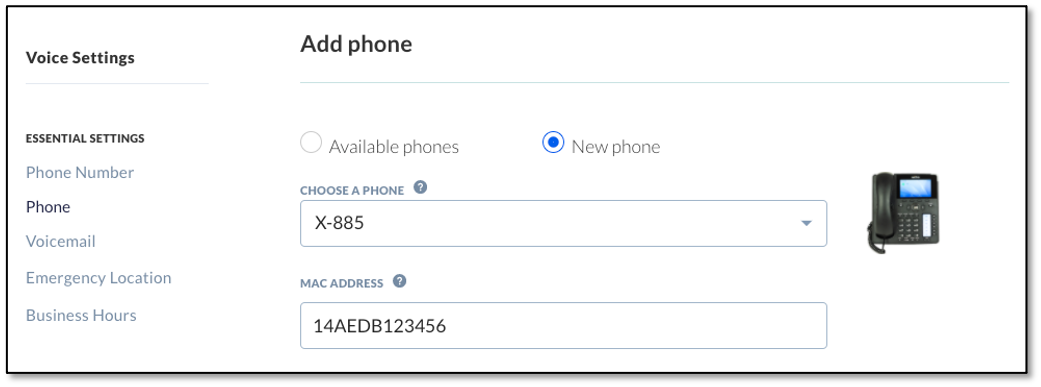
From the NextOS admin home page, select Users > Actions > Voice Setup or Voice Settings if the user is already set up with voice. Select Phone under Essential Settings on the left.
Add a phone by choosing between the Available phones or by adding a New phone. To add a new phone, choose a phone > enter MAC address > Save.
TIP: If the exact model is not listed, pick Phone not listed (Generic SIP).
Nextiva phone
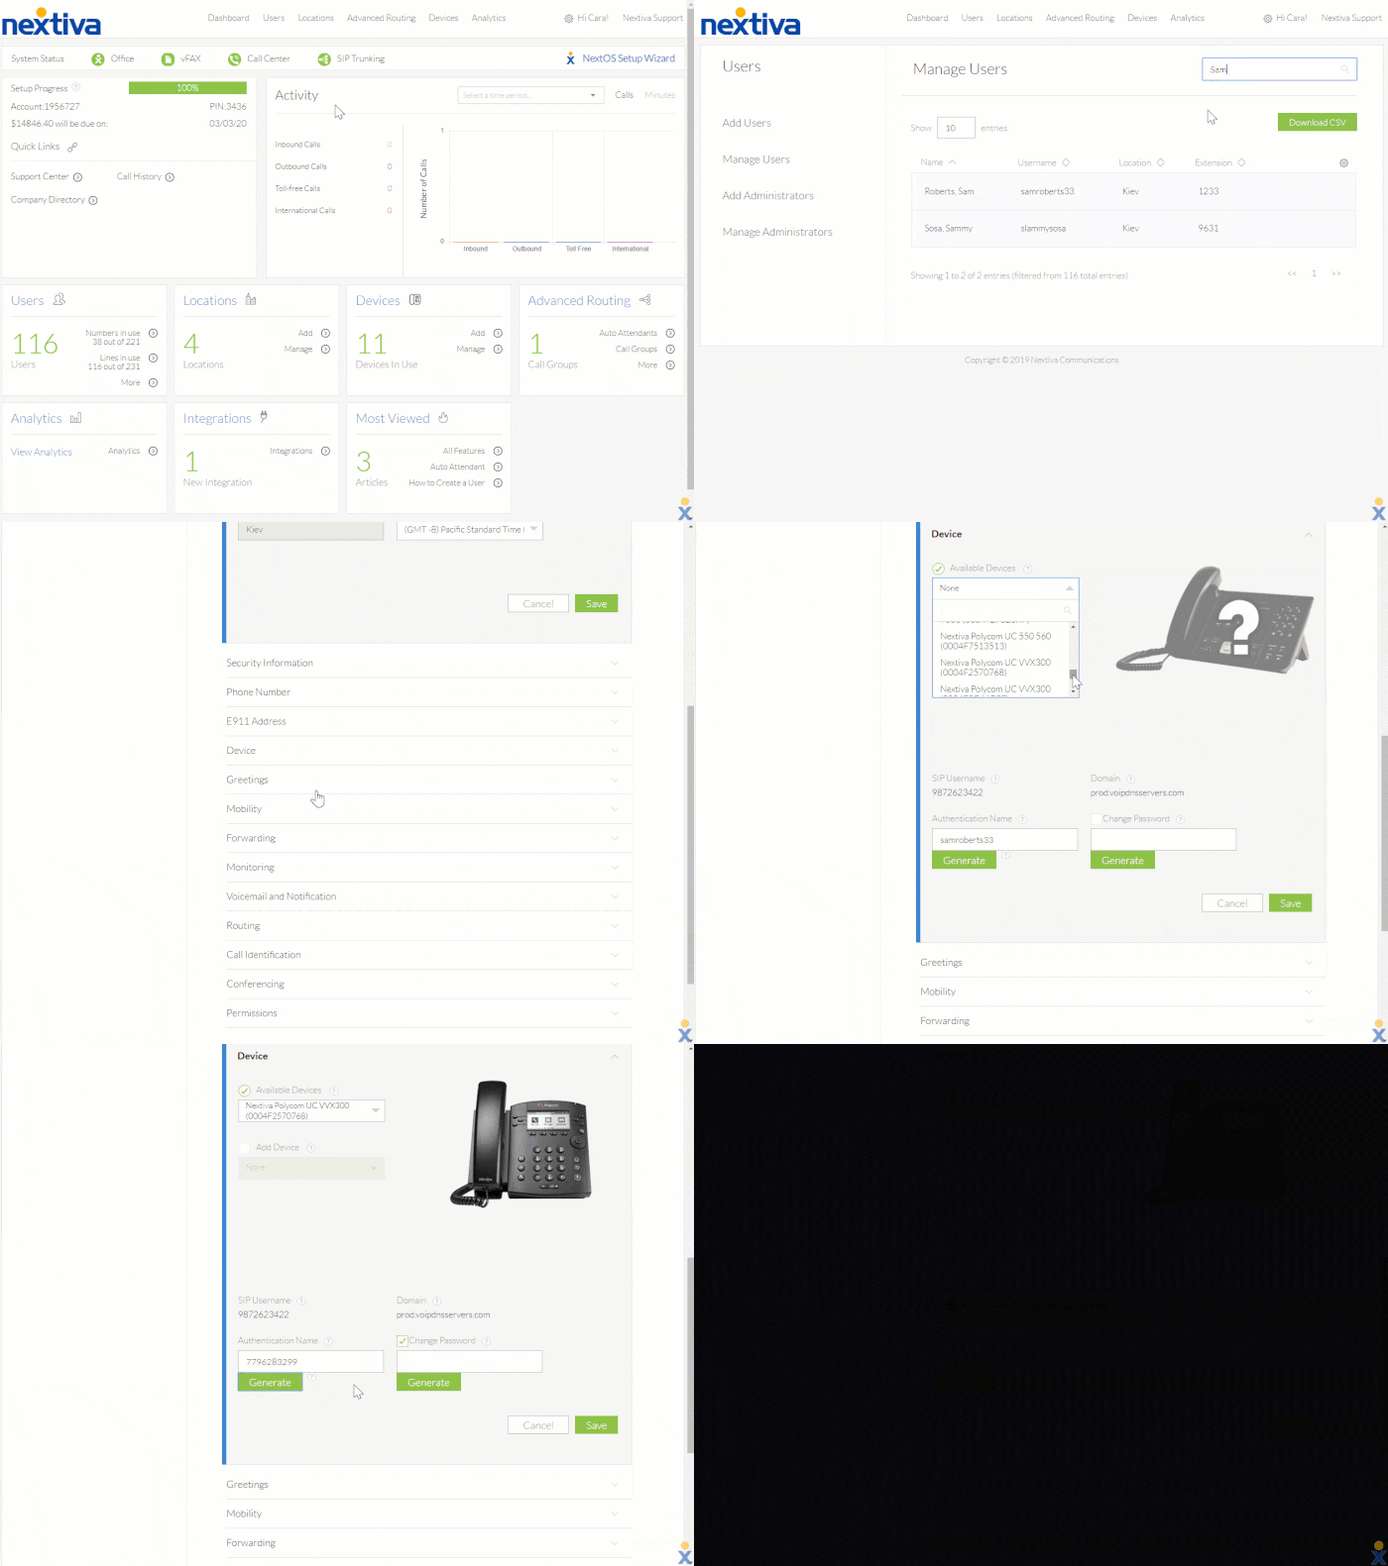
From the Nextiva voice admin dashboard, hover over Users > Manage User > edit user (Pencil) > Device > available devices. Select the device from the drop-down > Change Password checkbox, and click both Generate buttons to generate newauthentication details > Save.
Non-Nextiva phone
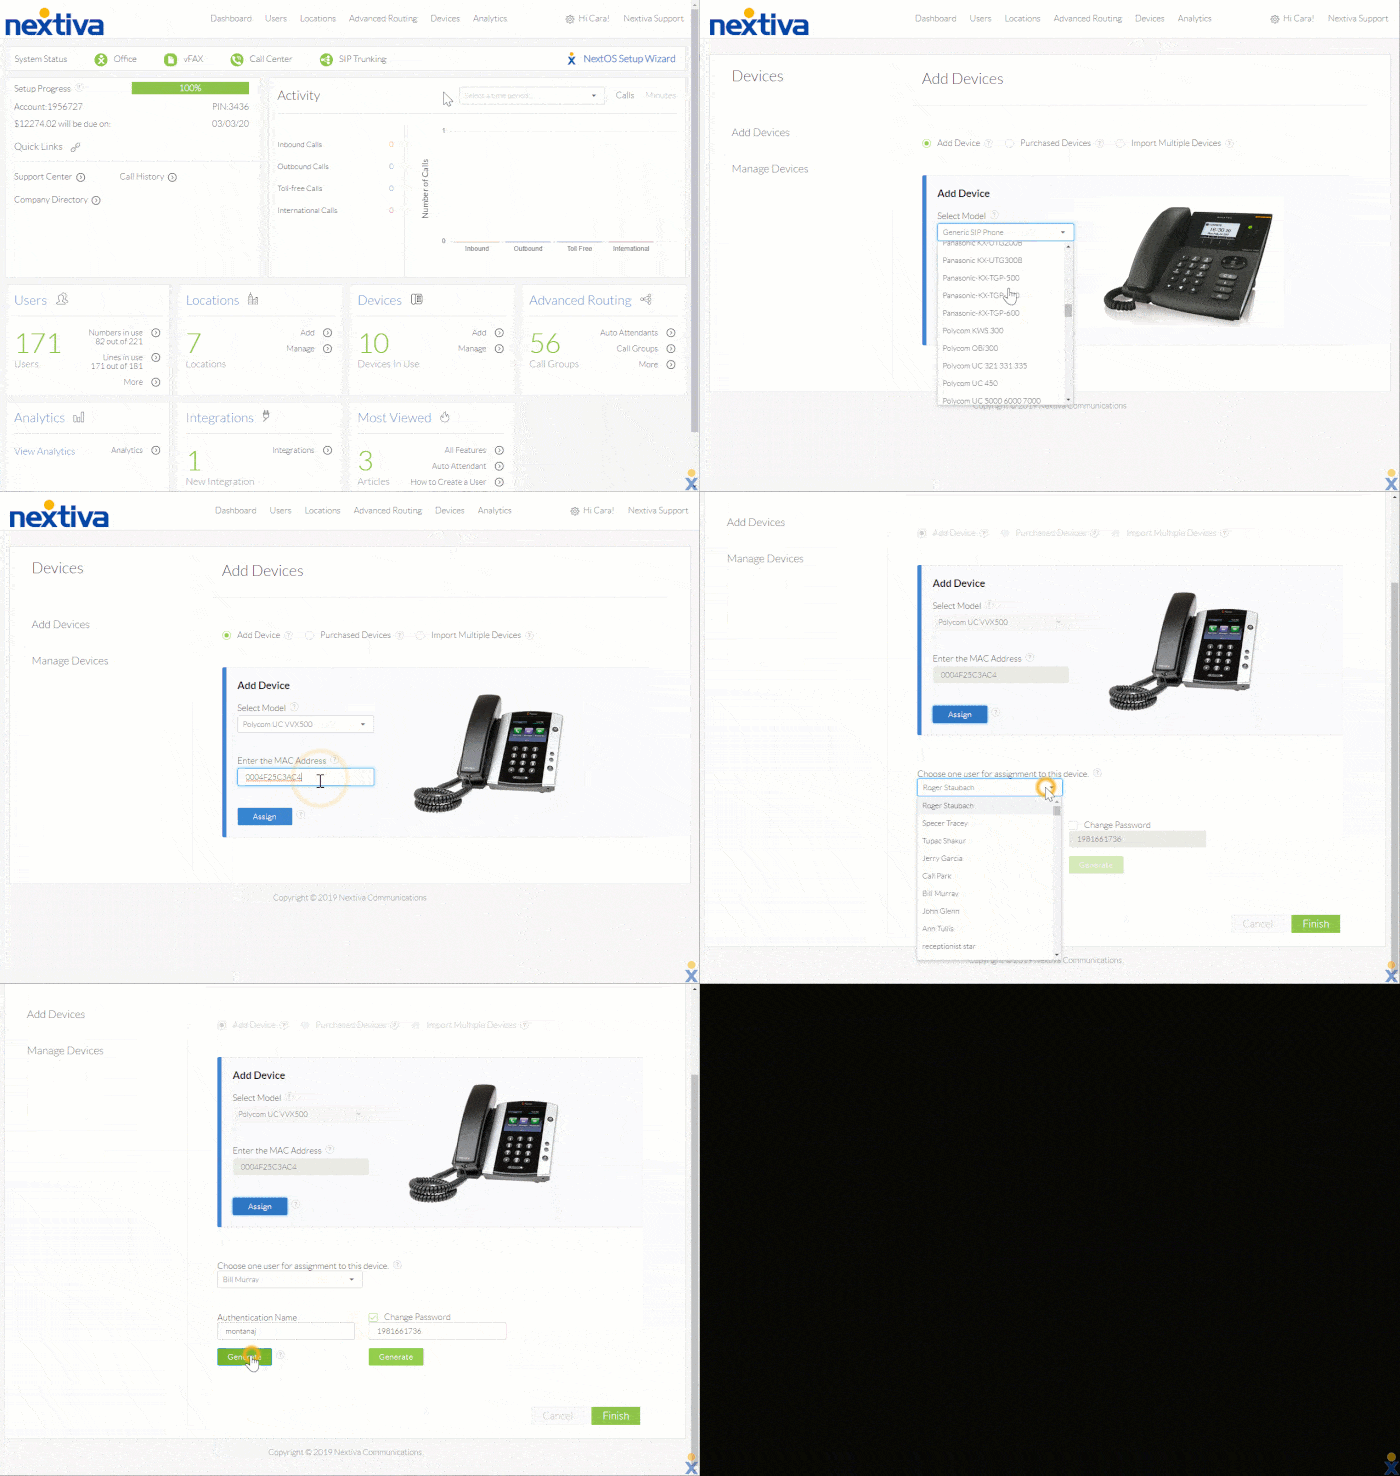
To add a device not purchased from Nextiva, hover over Devices > Add Devices. Select the model of the device to add. If the desired model is not listed, pick Generic SIP Phone.
TIP: Import multiple devices (up to 100) to an account at one time by selecting Import Multiple Devices > Download XLS/CSV Template > Upload Complete Template.
Enter MAC address > Assign > select the user from the drop-down > Change Password checkbox, and click both Generate buttons to generate new authentication details > Finish.